
If you own Samsung Galaxy A13 and want to get the full advantages of TWRP recovery or custom recovery. As it allows users to install third party Firmware’s, replacing the stock recovery, backup the current system and more you want to do. In this blog post, we’ll be sharing a complete instructions on how to install TWRP on Samsung Galaxy A13.
If you install TWRP on Samsung A13, you can flash third-party zip files for performing actions like as installing custom ROMs, making backups, improving performance, flashing modifications, and others that are restricted in stock recovery. As you may know that all Android smartphones come with limited stock recovery options. Therefore, TWRP offers more customization options and functionality to Android users than the stock recovery.
Benefits of TWRP Recovery:
- It enables users to simply create full backups.
- Users may quickly install custom ROMs, kernels, and modifications.
- You can quickly root and unroot your phone by flashing SuperSU and Magisk files without a computer.
- It can improve the performance of your smartphone by enabling overclocking or underclocking.
- It enables the installation of themes, modifications, and tweaks via custom zips that require root/recovery access.
- Bloatware, such as pre-installed programs, can be removed by users.
- It allows you to simply erase data, clear system cache, fix permissions, and manage system files.
- You can modify the build.prop file, which contains device settings for overclocking, flag switching, and other things.
Disadvantages of TWRP Recovery:
- TWRP installation could be a dangerous technique that can harm your phone if done wrong.
- Samsung OTA updates may not receive.
- Banking apps may be inaccessible.
How to Install TWRP on Samsung Galaxy A13: A step by step procedure
TWRP is compatible with a wide number of Android smartphones such as Samsung, OnePlus, Xiaomi, Huawei and so on. TWRP Recovery is available in two versions: official and beta. Both are simple to use and secure. I’ll show you how to install custom recovery or custom ROMs, whether you have a PC or a laptop.
If you want to unlock the full potentials of your smartphone then follow our guidelines as given below. We are going to share everything with a step by step, so read carefully. If you have an issue, we will tell you to “please read this again.”
Do the following before installing TWRP:
Before starting this tutorial, make sure to keep in minds these with following:
- Make a comprehensive backup of all of your vital data, including contacts, files, movies, and photographs, before making any changes.
- Charge your phone to at least 50%.
- Check that your mobile’s “Developer option” is enabled. If this is not the case, Go to Settings > About Phone > Build Number (seven times simultaneously). It’s helps you in accessing special settings and tools.
- Your phone is now in developer mode. Then, ensure that the “OEM option” or “USB debugging” option is enabled.
- You need to unlock bootloader. Simply turn off your phone and keep pressing “Power button > Volume Up + Volume Down” keys simultaneously while connecting your phone to a computer via a data cable until you see the “Warning” screen. Then keep pressing the “Volume Up” button for more than 7 seconds to unlock the bootloader option. When prompted to confirm whether you wish to unlock the bootloader, use the volume buttons to travel to ‘Yes‘ and then hit the power button to confirm.
- You can also read How to Unlock Bootloader Without a Computer for more information. All of the preceding stages are critical if you wish to install TWRP recovery or custom recovery on your Samsung Galaxy A13.
- You need a computer or laptop as we are going to use it and an original USB cable to ensure a smooth connection between computer and your phone.
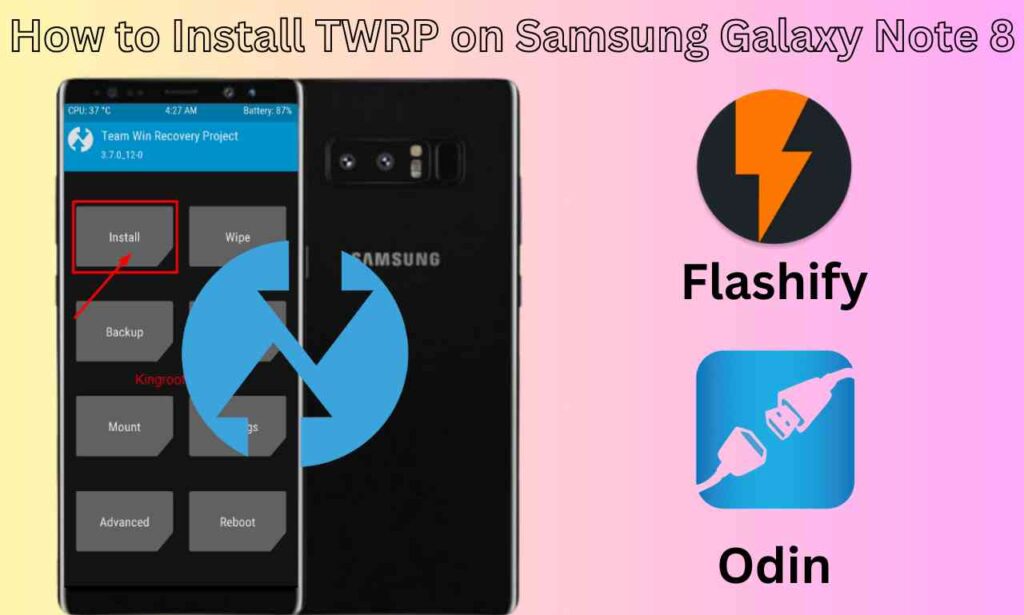
Instructions to install TWRP on Samsung Galaxy A13 Using Computer:
This method is too tricky that requires a computer or laptop and original USB cable. In this method, we use most popular tools like “Odin for computer.” Odin is a powerful tool that used to flash firmware on Samsung android phone without tripping the Knox security. It has good reviews and ratings and mostly used.
In order to install TWRP, then here are the general steps to follow:
Downloading TWRP file:
Step#1: To begin, we must download TWRP for our individual Samsung A13 model. Simply, go to Google and search search your model number like Samsung Galaxy A13 and give a space and then write TWRP or other custom recovery. For instance you see the model and processor that your phone have.
Step#2: Remember that you need to find to download “.image.tor” file. Then you have downloaded TWRP tar file, move it to your computer.
Downloading Odin For Pc:
Step#1: Then make sure that you have downloaded Odin tool, simply download from this link.
Step#2: Ready to install by following some simple instructions.
Boot into Download Mode:
Step#1: After that, you need to go to the download mode. Firstly, turn off your Samsung A13 mobile. Once your phone goes to switch off mode then press on (bixby+volume down+power) buttons at the same time and hold all these three until you will not see warning screen. Now to continue you have to press “volume up” button once and again press for yes. You see the download screen which we need.
Flash .Tor file Using Odin:
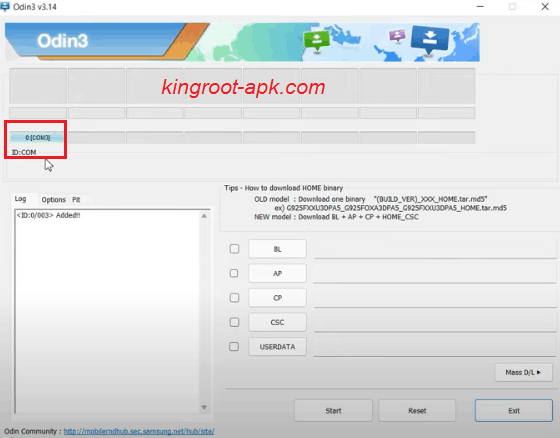
Step#1: Open Odin program on your computer. You need to connect your phone to computer via USB cable that is generally type c. Once it connected, you see this COM as shown in image. It means that your phone has been detected.
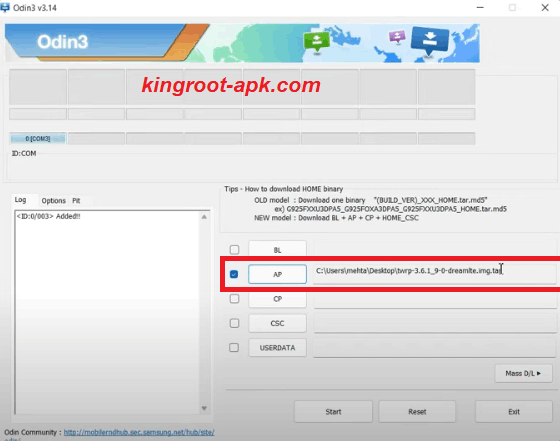
Step#2: In this step, you see all slots such as “BL, AP, CP, CSC, UserData“. You need to click on “AP” to choose TWRP tar file that you have just downloaded or move into you computer. Tap to open, it might take some time or depending on how heavy that file.
Step#3: Make sure you have disable Auto Reboot in option as shown in picture. If not then uncheck the “Auto Reboot” button.
Step#4: Click on “Start” button. It will take some time to complete.

Step#5: Once complete, you will see pass as shown in image. It means that the recovery has been successfully flashed.

Step#6: Now, you need to boot into recovery mode. Firstly get out from download mode. So, press “Volume Down” key and power button for 7 seconds.
Instructions to check:
Step#1: During this moment’s your Samsung Galaxy A13 is about to boot up. So, you can start the combination of recovery by pressing (Bixby+Volum Up+Power) button quickly and holding these combinations until recovery page not open. If you fail to boot it on time then you phone will boot up. You can try again right after switch off your device.

Step#2: Once recovery page open. You can swipe to allow system modification. So, in this way you can install TWRP on galaxy a13 easily. If you want to root it and don’t know how, then you can learn more about from our guidelines.
How to Root Samsung Galaxy A13?
Users who root their Samsung Galaxy A13 gain administrative access to the Android operating system. With rooting, you can alter system files, remove manufacturer limitations, and install new software, among other things. If you are interested in rooting your smartphone then we recommend to read our guide on how to root your Android phone. It will provide you a deep knowledge about rooting that you need.
Read Guide: Root Samsung Galaxy A13
Final Words:
By following above instructions hope you have successfully installed TWRP on your Samsung Galaxy A13 smartphone. Now you can get full advantages of custom recovery such as installing custom ROMs or custom kernels, installing moded files that are not possible in official stock recovery. Remember that specific techniques depending on the model and firmware version of your device. If you still confuse about this guide or any questions related, please contact us. We will get back to you as soon as possible.