How to Install TWRP on Samsung Galaxy A10s With Odin
Samsung Galaxy A10s is a budget-friendly smartphone that was released in 2019. It comes with MediaTek Helio P22 Octa-core processor, 2gb/3gb RAM or 32gb internal storage with 4000mAh battery. Some users have unhappy the certain issues with its performance such as slow response times, limited RAM or storage and battery drain.
Due to its performance issues, users installs optimization apps, clear caches, uninstall unused apps, factory reset and more. But it’s not enough to proper improve it’s performance. One of the best option to fix it’s performance known as installing custom recovery.
TWRP (Team Win Recovery Project) and CWM (ClockworkMod Recovery) are the two most well-known types of custom recovery. We advise installing TWRP on your Samsung a10s if you’re interested in installing custom recovery. We’ll be giving you easy instructions on how to install TWRP on Samsung Galaxy A10s in this post, regardless of your level of experience.
Table of Contents
What is TWRP Recovery? How to install
TWRP recovery is the popular recovery image that is used to flash third party firmware like custom kernels or mods, accessing to root & ADB, create backup & restore Android system, clear caches, high customization and more. It provides touch-screen GUI interface that allows users to unlock their device potentials.
In addition, TWRP is a powerful tool to improve your device performance, providing numerous features than are not available in official stock recovery provided by device manufacturer.
If you want to take full feature of Samsung Galaxy A10s, then you need to install TWRP. The process is straightforward if you follow our guides.
Advantages of installing TWRP Recovery on Samsung A10s:
- It allows users to easily create comprehensive backups of their bootloader, operating system, data, and apps.
- Users can easily install ROMs, custom kernels, and customizations.
- Users can uninstall pre-installed applications and other bloatware.
- It simplifies system file management, permission changes, cache clearing, and data removal.
- It allows you to install custom zips that contain themes, tweaks, and customizations that require root or recovery access.
- Without a computer, you can quickly root and unroot your Samsung Galaxy A10s.
- It enables overclocking and underclocking, which improves the performance of your smartphone.
Disadvantages of installing TWRP Recovery on Samsung A10s:
- TWRP installation can be a dangerous technique that can harm your phone if done incorrectly.
- Receiving OTA updates from Samsung is a problem.
- Banking applications may not function properly.
Perfect Steps To Install TWRP On Samsung Galaxy A10s:
In this section, we’re going to install TWRP recovery with step-by-step instructions. So, you can fully access the hidden features of your Samsung Galaxy A10s. To ensure a smooth process, make sure your smartphone is ready to go before you begin.
Pre-Requisites before installing TWRP Recovery:
- Check that your phone is at least 50% charged.
- Make a complete backup of everything such as contacts, images, videos etc.
- Remove the Samsung account, device password, fingerprint lock, and pin.
- A laptop or computer as well as a genuine USB cable are required.
Step#1: Bootloader Unlocking
The first step that you need to unlock bootloader of your Samsung Galaxy A10s. Without unlocking bootloader, you can’t install TWRP. As bootloader is the special code/program that execute prior on your phone starts to run and also loads the device system software. Unlocking the bootloader gives your phone complete permission to install custom recovery. The process is quite simple, just follow the steps carefully.
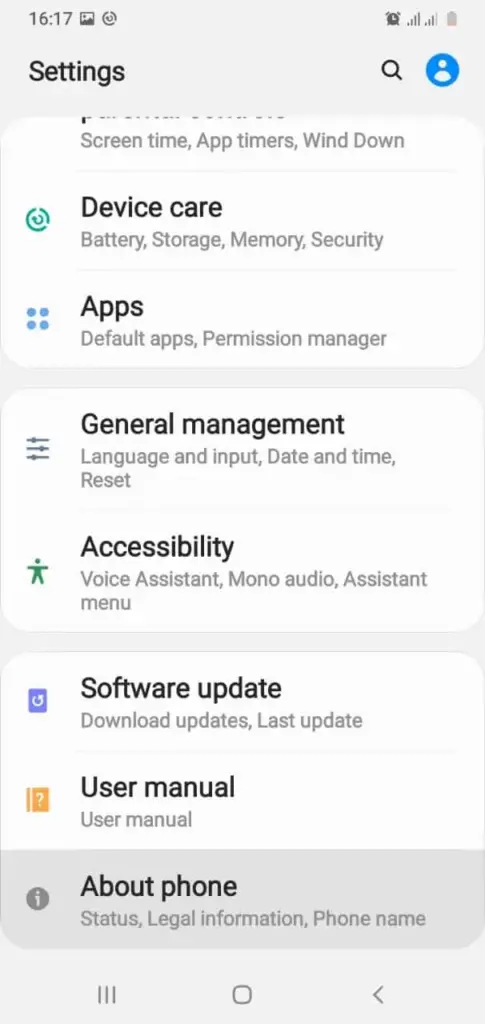
- First of all, go to the settings of your Samsung Galaxy A10s ultra and then scroll to bottom find “about phone” option and open.
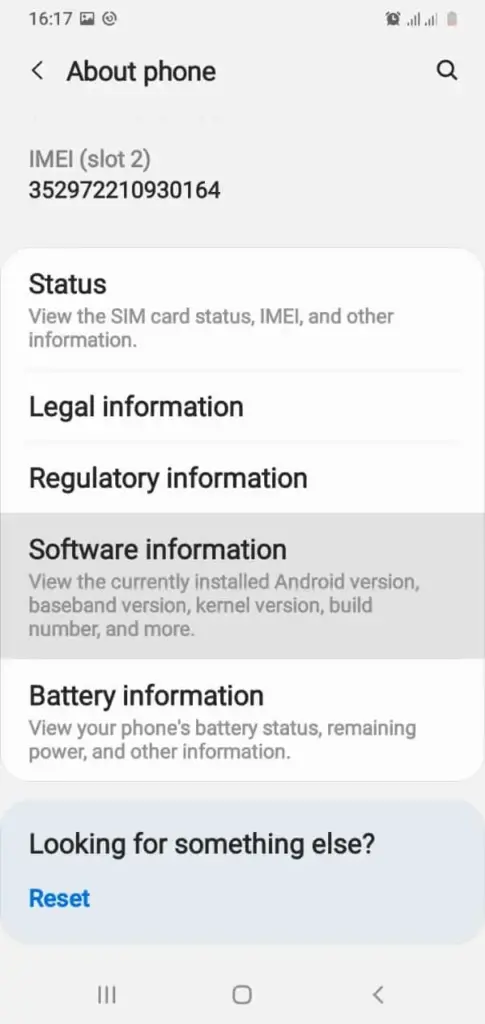
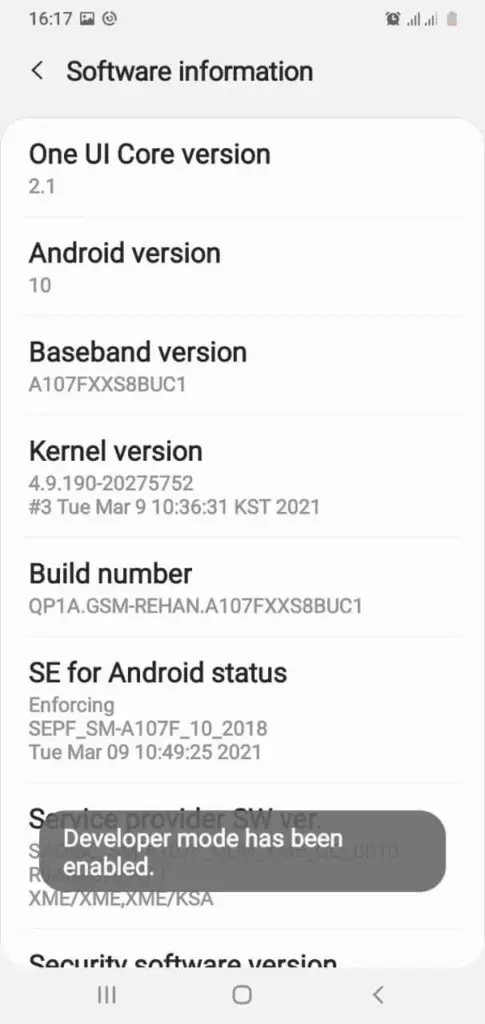
- After that and select “software information“ for to view build number.
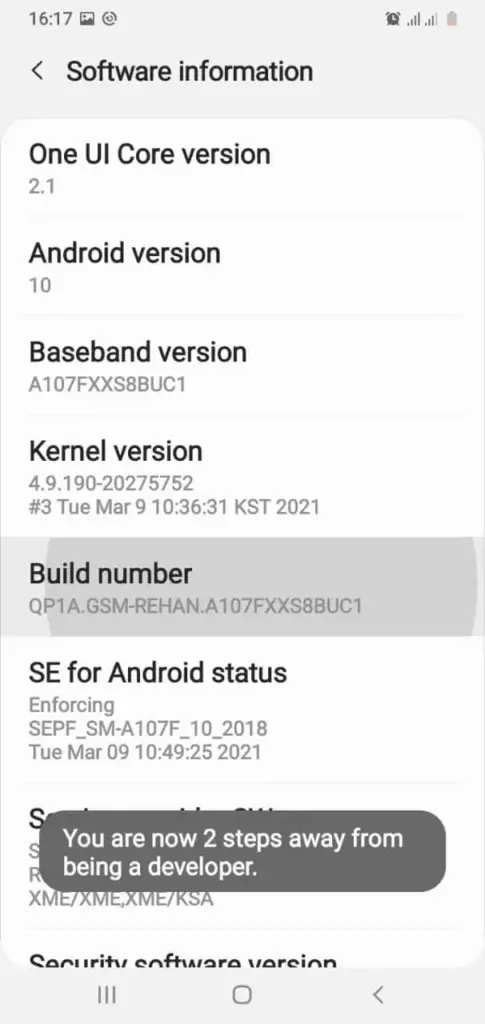
- Then tap “build number” for about seven times simultaneously until the developer mode is enable.
- You will see “developer mode” has been enabled.
- Then scroll down to enable “OEM unlock” option. Here you see bootloader already unlocked.
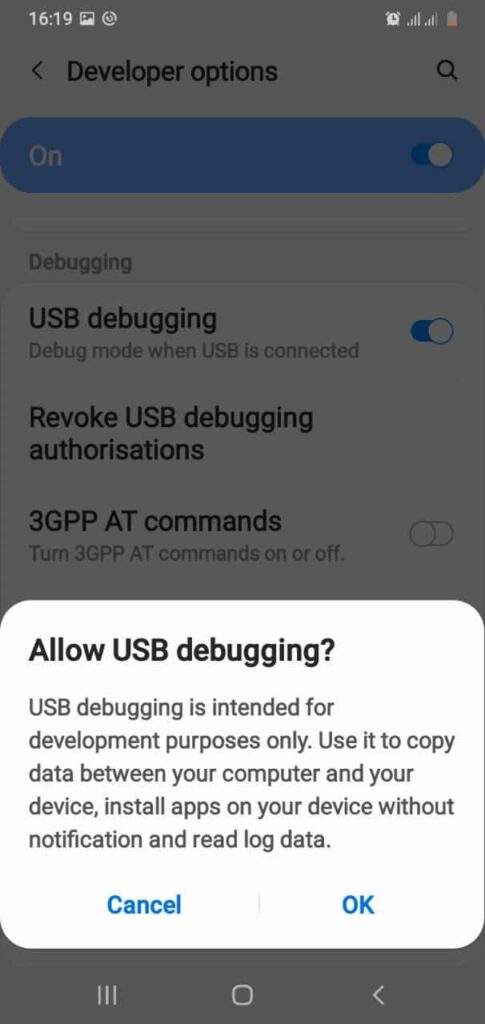
- Again scroll to bottom and enable “USB debugging” option.
- In this step, turn off your phone and connect it to a computer using a data cable. Then, keep pressing the “Power button + (Volume Up + Volume Down)” keys at the same time until you see the “Warning” screen. To unlock the bootloader option, press and hold the “Volume Up” button for a duration longer than seven seconds. Use the volume buttons to navigate to “Yes” when asked if you want to unlock the bootloader, and then press the power button to confirm.
Step#2: Downloading necessary tools and files
This is the most important step because you will need to download the TWRP file or programs in order to install TWRP on your Samsung A10s. TWRP recovery files and other custom recovery files can be obtained from the official website or trusted forums such as XDA Developers and the Github community. To proceed to the next step, follow the instructions for a successful procedure and unlocking your device’s capabilities.
- Download Odin tool for pc use. Run it to install on your computer/laptop.
- TWRP recovery file needed to download you can visit official site. Remember that you need to find to download “.image.tor” file from here.
- Then you have downloaded TWRP tar file, move it to your computer.
Step#3: Boot into Download Mode
Moving into download mode is necessary because firmware must be flashed. As a result, it helps in the installation of TWRP recovery on Samsung devices. Simply follow these steps to successfully boot your device into download mode.
- In this section, you need to go to the download mode. Firstly, turn off your Samsung A10s mobile. Once your phone goes to switch off mode then press on (bixby + volume down + power) buttons at the same time and hold all these three until you will not see warning screen.
- Now to continue you have to press “volume up” button once and again press for yes. You see the download screen which we need.
Step#4: Flashing TWRP file Using Odin
Your smartphone is now prepared to install TWRP after this final setup. Verify that your device is in download or recovery mode and that you have completed all previous steps. We’ll be showing a few simple steps for you to follow.
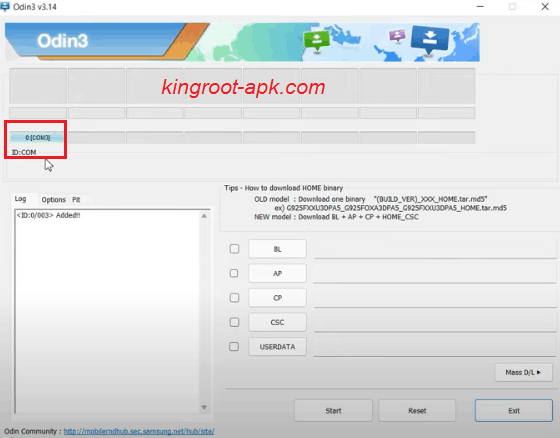
- Open Odin program on your Pc. You need to connect your phone to computer via USB cable that is generally type c. Once it connected, you see this COM as shown in image. It means that your phone has been detected.
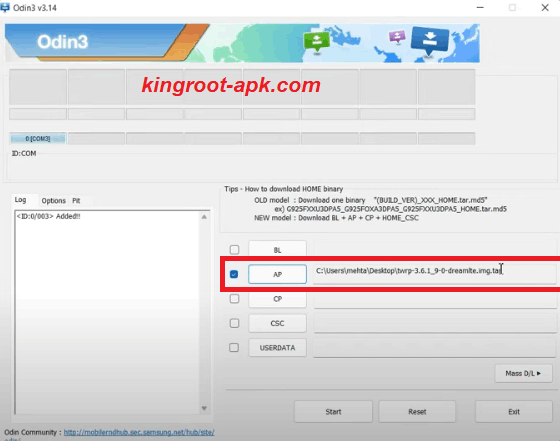
- In this step, you see all slots such as “BL, AP, CP, CSC, UserData“. You need to click on “AP” to choose TWRP tar file that you have just downloaded or move into you computer. Tap to open, it might take some time or depending on how heavy that file.
- Make sure you have disable Auto Reboot in option as shown in picture. If not then uncheck the “Auto Reboot” button.
- Click on “Start” button. It will take some time to complete.
- Once complete, you will see pass as shown in image. It means that the recovery has been successfully flashed.
- Now, you need to boot into recovery mode. Firstly get out from download mode. So, press Volume Down key and power button for 7 seconds.
- During this moment’s your Samsung Galaxy A10s is about to boot up. So, you can start the combination of recovery by pressing (Bixby+Volum Up+Power) button quickly and holding these combinations until recovery page not open. If you fail to boot it on time then you phone will boot up. You can try again right after switch off your device.
- Once recovery page open. You can swipe to allow system modification.
How to Root Samsung Galaxy S23 Ultra?
TWRP recovery allows you to quickly root your Samsung Galaxy A10s and gain more administrative access to your smartphone’s operating system. Rooting allows you to do a variety of things, including install new apps, edit system files, and remove manufacturer restrictions. If you want to root your smartphone, we recommend reading our guide on how to root an Android phone. It will provide you with a thorough understanding of roots.
Read Article: How to Root Samsung Galaxy A10s?
Final Words
I hope you were able to install TWRP on your Samsung Galaxy A10s smartphone by following the instructions above. As you are aware, we went over every step of the procedure, including preparing, unlocking the bootloader, downloading the Odin or TWRP file, booting into download mode, and installing TWRP. Please contact us if you have any more questions about this tutorial. We promise to reply as soon as we can.

